BACK TO PAGE 7
IMPORTING TEST VIDEO CLIPS
Now that Final Cut Pro is open again and you have your project file open, you are going to add some video files to your project.
TIP: You should be able to easily remember where the "testvideo" folder is located but, if you somehow forgot and needed to find it again and but you DIDN'T want to shut down Final Cut Pro just just to see the desktop, there is a keyboard shortcut that will help. To quickly move all of the Final Cut Pro windows (or any other application's windows) out of the way, hold down the “apple” key on the keyboard and hit the “H” key. “Apple+H” is a shortcut keystroke that will “hide” whatever window you’re currently working with. Clicking the Final Cut Pro icon in the program dock at the bottom of your screen will then return your Final Cut Pro windows to their visible state.
To add the video files to your project in Final Cut Pro, go to File -> Import -> Files... This window will start you off in your "documents" folder. Since you saved the "testvideo" folder to your Desktop, so you'll have to navigate your way to it. But take note of where your documents folder is, because this is the folder where you might want to save files in the future. The computers in Mulberry are set up so you have your own folder within a "Users" folder. It is very important that you NEVER save files to anyone ELSE'S folder. Make sure that all files, projects, media or whatever, are saved in the correct place.
Since you saved the folders to your desktop, navigate your way back up to your desktop, or merely click the "desktop" shortcut on the left side of the window. Once there, open the "testvideo" folder and import the "- TESTVIDEO1 NEW" and the "- TESTVIDEO2 NEW" video files. If you are still not able to locate these or can't figure out how to navigate your way around the Mac file system, hit cancel and start again.
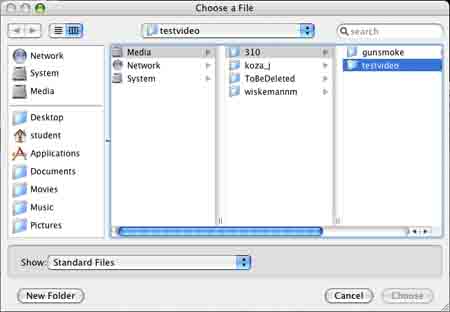
You can either import each file one at a time, or select multiple items at once by holding down the Apple key as you click to select multiple files.
After importing them, you should now see the two files in your browser window.
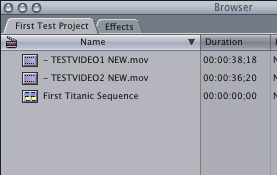
You should note the difference between the icon for the sequence and the video clips.
- The Sequence (because it’s made up of multiple clips) has 4 little strips of film on it. ![]()
- The Video Clip is just a single strip of film. ![]()
Look at the columns in the browser window to the right of each clip or sequence name. They display the “duration” (how long the clip is) and the “in” and “out” points for the clip. By using the scrollbar at the bottom of the Browser window, you can see a large amount of information about each clip.
As you can see, the clips you just imported are each about 30 seconds long (38 sec and 36 sec respectively). There aren’t currently any in or out points set, so if you were to add this to your timeline (which would add it to your sequence) then you would be adding the entire clip. More about “In” and “out” points later.
FORWARD TO PAGE 9 – “Viewing Clips”