SEQUENCES
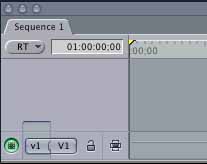
At this point you should each see a sequence icon in your browser that says “Sequence 1” next to it.
Look down to the “TIMELINE” window and you’ll see that it has a tab that says “Sequence 1” on it
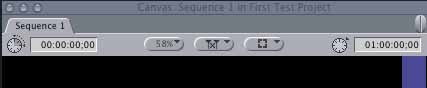
Now look over at the Canvas window andyou’ll see that it ALSO has a tab that says “Sequence 1”. That is because the sequence that’s in your BROWSER is currently loaded into your TIMELINE, which would then be played back on your CANVAS. Since there aren’t any video or audio clips in your sequence, you don’t see anything in your canvas window.
Go to your BROWSER window and rename “Sequence 1” by highlighting/selecting it with your mouse and then clicking on it and typing the name “First Titanic Sequence”, you’ll see that the name changes in the other windows as well. Make sure you understand this relationship between the three windows.
MULTIPLE SEQUENCES
Just as you can have multiple projects open at once, you can also be working on multiple sequences at the same time as well.
You can put together MULTIPLE sequences within your project and the tabs at the top of the TIMELINE and the CANVAS windows will allow you to jump back and forth from sequence to sequence. It’s important that you name each of the multiple sequences something that makes sense to you so you don’t get them confused with one another.
NOTE: This is useful when dealing with a longer project like a feature film. You can edit different scenes or sequences individually and then combine them all together in your project later. However, for this class, you do not have to use multiple sequences simultaneously. Frequently it’s best to just keep it simple and work with a single sequence and editing the same footage in more than one sequence at a time can sometimes leave you unsure of which sequence is the 'right' sequence. If you're looking at your sequence and can't figure out why things have seemingly changed, make sure you're actually looking at the sequence you think you are.
BINS
As you can see in the FCP handout (but not on your screens) there are little folders inside the browser window that look like this: ![]()
Each of these folders is a “bin”, and these bins are where you organize your clips, subclips audio etc.
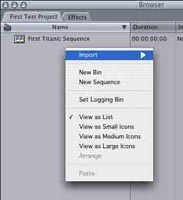
You can create bins by holding down the “control” button and clicking your mouse in the Browser window. This will open up a little menu where you can select “New Bin”
When working on a project, you might want to have one bin to hold all your music, one bin to hold footage from one location, another bin to hold footage from another location etc.
It’s much easier to begin your organizing early instead of having to go back later and figure out what you’ve done. So as soon as you start putting clips into your Browser (project) you should create a bin and label it something appropriate.
-- Create a bin and name it “Test Footage Bin”
FORWARD TO PAGE 7 – “Getting Video Into Your Project”