MAKE SURE THE AUDIO OUTPUT IS SET UP CORRECTLY
Go to Final Cut Pro > Audio/Video Settings... and the Audio/Video Settings window will open. Make sure you're on the "Summary” tab (look at the top). At the bottom of this window make sure that “Video Playback” is set to “Apple Firewire NTSC (720 x 480)” and “Audio Playback” is set to “Digidesign Mbox 2”.
If the "Video Playback" option says "[MISSING]"before "Apple Firewire...", that's just because your deck is turned off. If it says [NONE], that is okay as well. We will talk later about setting up the deck for video playback.
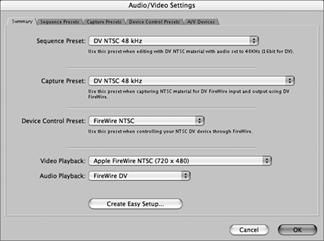
If the Audio Playback is set to “Digidesign Mbox 2”, the audio will be routed through the Mbox and then to your speakers or headphones. This is what you want while you’re working on this first exercise, but make note where this option is located because, in the future, you will need to change it from “Digidesign Mbox 2” and put it on the “Firewire” option instead.
FORWARD TO PAGE 4 – “Starting a New Project”