
CS 110 Lab Project 4
A Picture Editor: Practice with Lists and Loops
In this lab, out goal is to build on our experience with both Picture objects and with User Interfaces and to build a basic Picture Editor. This editor will only support a select few transformations on a user selected picture, and each transformation has in common that it must loop through every pixel in a source picture and process it to a resulting picture. We also should be able to Save our result to a new picture.
Operational Description
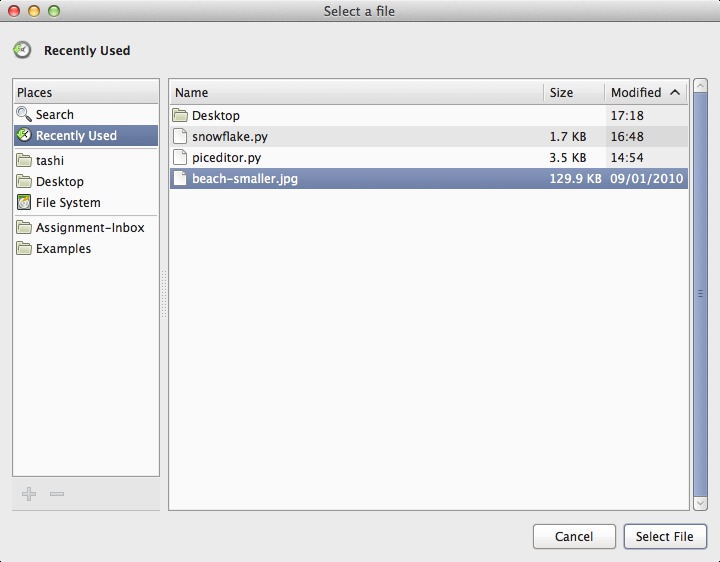
- When the program starts up, it should offer a file selection dialog box to the user, whereby the user can navigate the file system structure and select a jpeg image to be the source of the subsequent manipulations. This dialog is shown below.
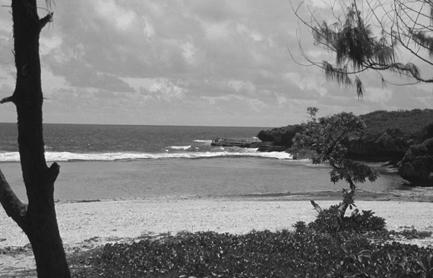
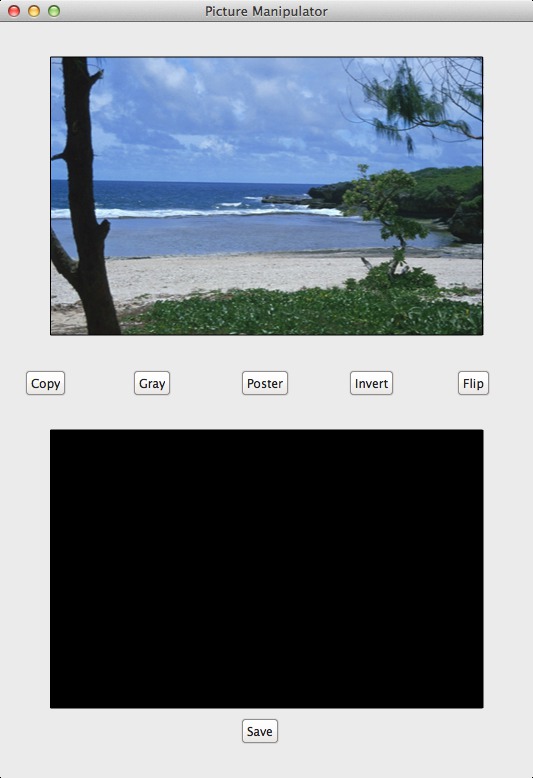
- Only after the original source picture has been selected should the window for interactions with the user be drawn. This window consists of two Pictures and a set of Buttons. In the top half of the window, the picture selected by the user should be displayed. This image will not change for the life of the program. Below the selected picture are set of of transformation buttons. Beneath the transformation buttons is another Picture object that is the same size as the original picture, but the color of all of its pixels is initially black. We will refer to this picture as the transformed picture. Beneath the transformed picture is a final button that the user should be able to use to save the transformed picture to a jpeg file in the filesystem. On the left below is a screen shot of the initial window layout after a user has selected a jpeg of a beach in step 1.
- Each of the transformation buttons performs some manipulation on all the pixels of a picture. As such, each has a picture image that is the source image of the transformation and a picture image that is the destination image of the transformation. Each of the transformations will now be described in turn:
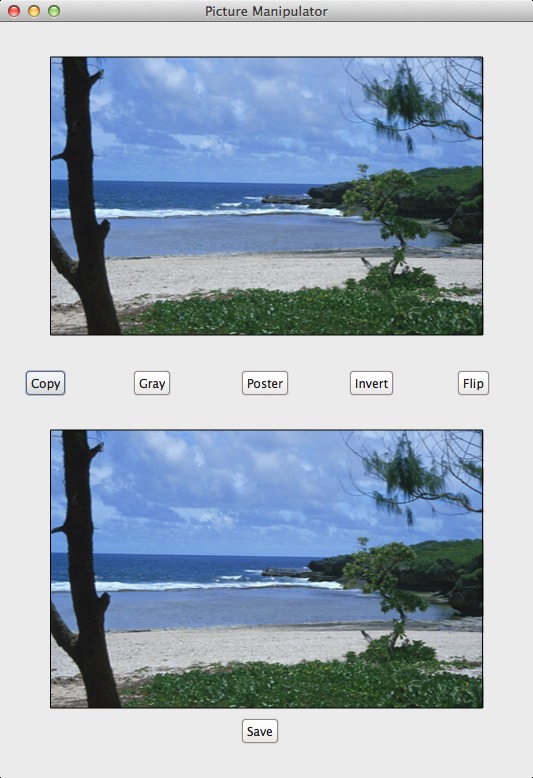
- Copy: In the Copy transformation, the source image is the original picture. The destination picture is the one represented in the lower half of the window (i.e. the transformed picture). There is really no transformation here at all -- for each pixel in the source image, the color is retrieved from the pixel and then the color of the corresponding pixel in the transformed picture is set to that color. The result of the user clicking the Copy button can be seen in the right-hand screenshot above. This should be implemented first, and should give us practice using a loop over all the pixels in a picture.
- Gray:In the Gray transformation, the goal is to convert whatever image is present in the transformed picture and make a grayscale variant of the same image. Thus the source image is the transformed picture (perhaps just freshly copied from the original by the user clicking "Copy" first), and the destination is also the transformed picture. The reason for having both source and destination the transformed picture is that it allows us to perform multiple transformations on a picture to get composed results. For those that may not know, shades of gray occur when all three of the red, green, and blue components of a color have equal value. So when we convert, we want to use the existing red, green, and blue values (which range from 0 to 255) to determine the brightness of that pixel by taking the average of their values and setting all three of the red, green, and blue components of the corresponding pixel in the destination image to that same average value. For example, if the pixel had a color given by (50, 50, 200) then the greyscale version should be (100, 100, 100), since (50 + 50 + 200) // 3 = 100. (Note the integer division.) This is depicted in the first picture below.
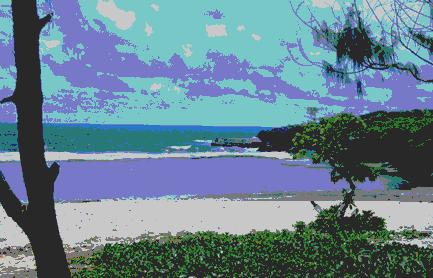
Poster:In the Poster transformation, the goal is to transform a picture so that the transformed picture uses fewer colors than the millions normally used. This is done by examining the values of each of the red, green, and blue channels and, for each, taking values that range from 0 to 255 and make them map to a set of just a few values. In this transformation again, the source image is the transformed picture (perhaps just freshly copied from the original by the user clicking "Copy" first), and the destination is also the transformed pictureFor example, currently the blue channel of any given pixel could have any integer value from 0 to 255. To posterize the image, we might simplify things by only allowing 3 values of blue: perhaps if the blue is between 0 and 80, we set it to 40, if between 81 and 160 we set it to 120, and if between 161 and 255 we set it to 240. If we were to do the same with red and green, then each color channel could only have 3 possible values, and thus the total number of possible colors would be 3 x 3 x 3 = 27. This creates a posterized effect (the way old posters looked when there were only a few colors that could be printed at any one time). This is depicted in the middle picture above. You should feel free to experiment with the mapping from original red, green, blue values to their new select few values.
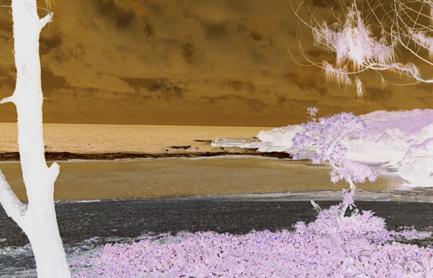
Invert:In the Invert transformation, we "invert" each pixel in a picture so that, for each of the red, green, and blue channels, we get a color negative of the channels. Since the original value of red, green, and blue is between 0 and 255, we accomplish the inversion by subtracting the original value from 255. So a pixel with r, g, b of (50, 155, 255) becomes (205, 100, 0). The source image is the current transformed picture, and the destination is the same. This transformation is depicted in the last image above.
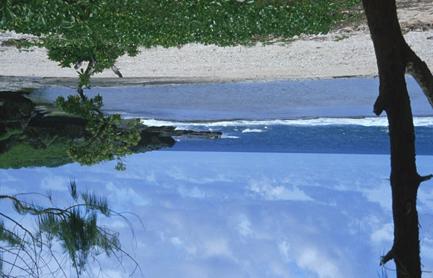
- Programmer's Choice:The final transformation is up to you. In my design of the program, I chose flipping the image, essentially reversing the color values from beginning to end of the image, but you are encouraged to be creative and come up with your own transformation. The source image is the current transformed picture, and the destination is the same, so this flip is just a little tricky in that we have to copy the color of the pixels in the picture to a new list before we start updating the picture. Otherwise, we get halfway through the transformation and then are selecting picture colors that have already been updated.
Programming Guidance
- File Selection Dialog
As part of the Myro module in Calico, they have provided just the function we need that brings up a Dialog box and allows the user to navigate through the filesystem and select the file they wish to work with. The function, pickAFile(), returns a string that gives the full pathname location of the file selected. It is then up to us, as programmers, to use this string to actually create the requisite Picture object. An example snippet of code showing the use of the function:
 from Graphics import *
 from Myro import *

 filepath = pickAFile()
 print('Path selected:', filepath)
If the user clicks 'Cancel' instead of selecting a file, pickeAFile() returns None. Remember that your code should be within some function, not at the outermost level as in the example above. - Laying Out the Main Interaction Window
Clearly, the size of the interaction window is dependent on the width and height of the picture selected, and will vary from run to run. While it might be ok to start with a large window, assuming some maximum size picture, we ultimately want the window to "fit right" based on the picture selected. This means that we have to first create the Picture object from the filepath string, and then to obtain the width and height of the Picture. With that, the size of the window can be calculated as the width of the picture plus room for side borders and twice the height of the picture plus room for buttons and border space. If I have a variable, pic, associated with a created Picture object, I can access the width and height of the object thusly:
 width = pic.width
 height = pic.height
I can also directly use pic.width and pic.height in expressions where I need the width and height. These variables of an object are called object attributes or object properties and we have seen them before when we access, for instance, the border property of a shape. - A "Blank" Picture
For the transformed picture, I need to create a Picture object that is the same width and height as the original picture, and has pixels whose color are all black. Fortunately, Calico gives us an alternate Constructor for Picture objects that, instead of giving a string pathname to an existing picture, has parameters for the width, height, and color of the, otherwise empty, picture. An example can be found in the Calico Graphics documentation section on Pictures.
- A Namespace Frame Accessible to Button Functions
Like in Rock, Paper, Scissors, our button functions need to be able to access variables created in the main line and mutually operated upon. In my solution, I found the need for just two variables in this frame: the variable associated with the original Picture object, and a variable associated with the transformed Picture object:
 class G:
   originalPic = None      # Reference to original Picture object
   transformPic = None     # Reference to transformed Picture object
These can be accessed through G.originalPic and G.transformPic and assigned to as well as methods invoked on from both the main line and from the button functions. - Programming Strategy for Transformations
Common to all of the transformations is that (1) we need to obtain a list of all the pixels from either one or from two pictures, and (2) we need to loop over all the pixels in the list to (a) obtain the color of an individual pixel from the source image, (b) do something to compute new red, green, and blue channels from the original red, green, and blue, and (c) set the color of an individual pixel in the destination image. Look at the operational description above to be sure you understand, for a given transformation, the proper source image and destination image.
- Getting a List of Pixels
Given a variable, pic, associated with a Picture object, we can associate a variable, pixelList with a list of all the Pixel objects in the Picture with the following assignment and method/function invocation:
pixelList = list(pic.getPixels())
So getPixels() is a method of Picture objects that returns something "close" to a list, but we have to call the built-in function list() to convert it into the List data structure we have been discussing in class. You should try this from the shell, creating a Picture object and then creating the list. Once you have the list, try invoking the len() function on it, and try to print individual elements, like pixelList[100], for instance. - Looping over the Pixels in a pixel list
Looping over the Pixels in a pixel list is really no different than what we have seen in class for looping over a list of integers. The only difference is the data type of the elements in the list. Suppose, as in the example above, the list of pixels is named pixelList. Since we want the number of iterations of the loop to match the number of pixels in the list, the argument to range() in the first line of the loop will be len(pixelList).
In the body of the loop, we need to reference individual Pixel objects in the list with pixelList[i]. Such a reference is associated with a pixel object, and so I often introduce a variable to allow me to more clearly be operating on a pixel, such as in the following example:
 for i in range(len(pixelList)):
     pixel = pixelList[i]
I can then invoke the methods of a pixel object on pixel to access and change the red, green, and blue color channels in a Pixel. Some of these are described below, and they all can be found in the Calico documentation. (Note that this intermediate step is not required ... I could just as easily invoke pixel methods on pixelList[i].) - Methods to access and set red, green, blue color channels in a Pixel
Say that I have a variable, pixel associated with a Pixel object. I can invoke methods getRed(), getGreen(), and getBlue() to obtain the red, green, and blue color channels of the pixel and associate them with integer variables r, g, b, respectively, as follows:
 r = pixel.getRed()
 g = pixel.getGreen()
 b = pixel.getBlue()
There are many other pixel methods documented under Calico Graphics: Pixels, but one that they do not cover that I found helpful is one that, given integer variables r, g, b, I can use to update all three color channels in a pixel with single method call:pixel.setRGB(r, g, b)
- Getting a List of Pixels
- Saving a Picture object
To save a picture, we need to first construct a string with two pieces of information: we need the name of the saved file from the user, including the '.jpg' extension, and we need a string specifying the folder location in the filesystem within which to save the file. Ideally, we would have a single dialog box offered to the user that would retrieve both of these pieces of information in one go. We know we do not want to select an existing file, so the pickAFile() Myro function does not solve our problem. Myro does, however, have a pickAFolder() function that we can use to have the user select a folder as the destination for the saved file. But to obtain the filename, we have to resort to our old standby, the input() function. We can then concatenate these two strings together (with an intervening '/' character) to create our required file pathname.
Say that we have a variable, savePath that is associated with this resultant string, and we have a Picture object named pic. The invocation of the Myro function to save a Picture object to a file in the filesystem is:
savePicture(pic, savePath)